

Here’s a step-by-step tutorial on how to illustrate a cityscape using Adobe Fresco.
Download these before you begin
I have used a reference image form unsplash to create this ‘illustrate a cityscape’ tutorial.
Watch the video tutorial on how to illustrate a cityscape with Adobe Fresco

Step 1: Set up your canvas
Open Adobe Fresco and create a new document by tapping on the “+” icon or selecting “New Document” from the home screen. Choose the canvas size and resolution that suits your needs. I have used Digital > Current screen size
Step 2: Select the brush and colors
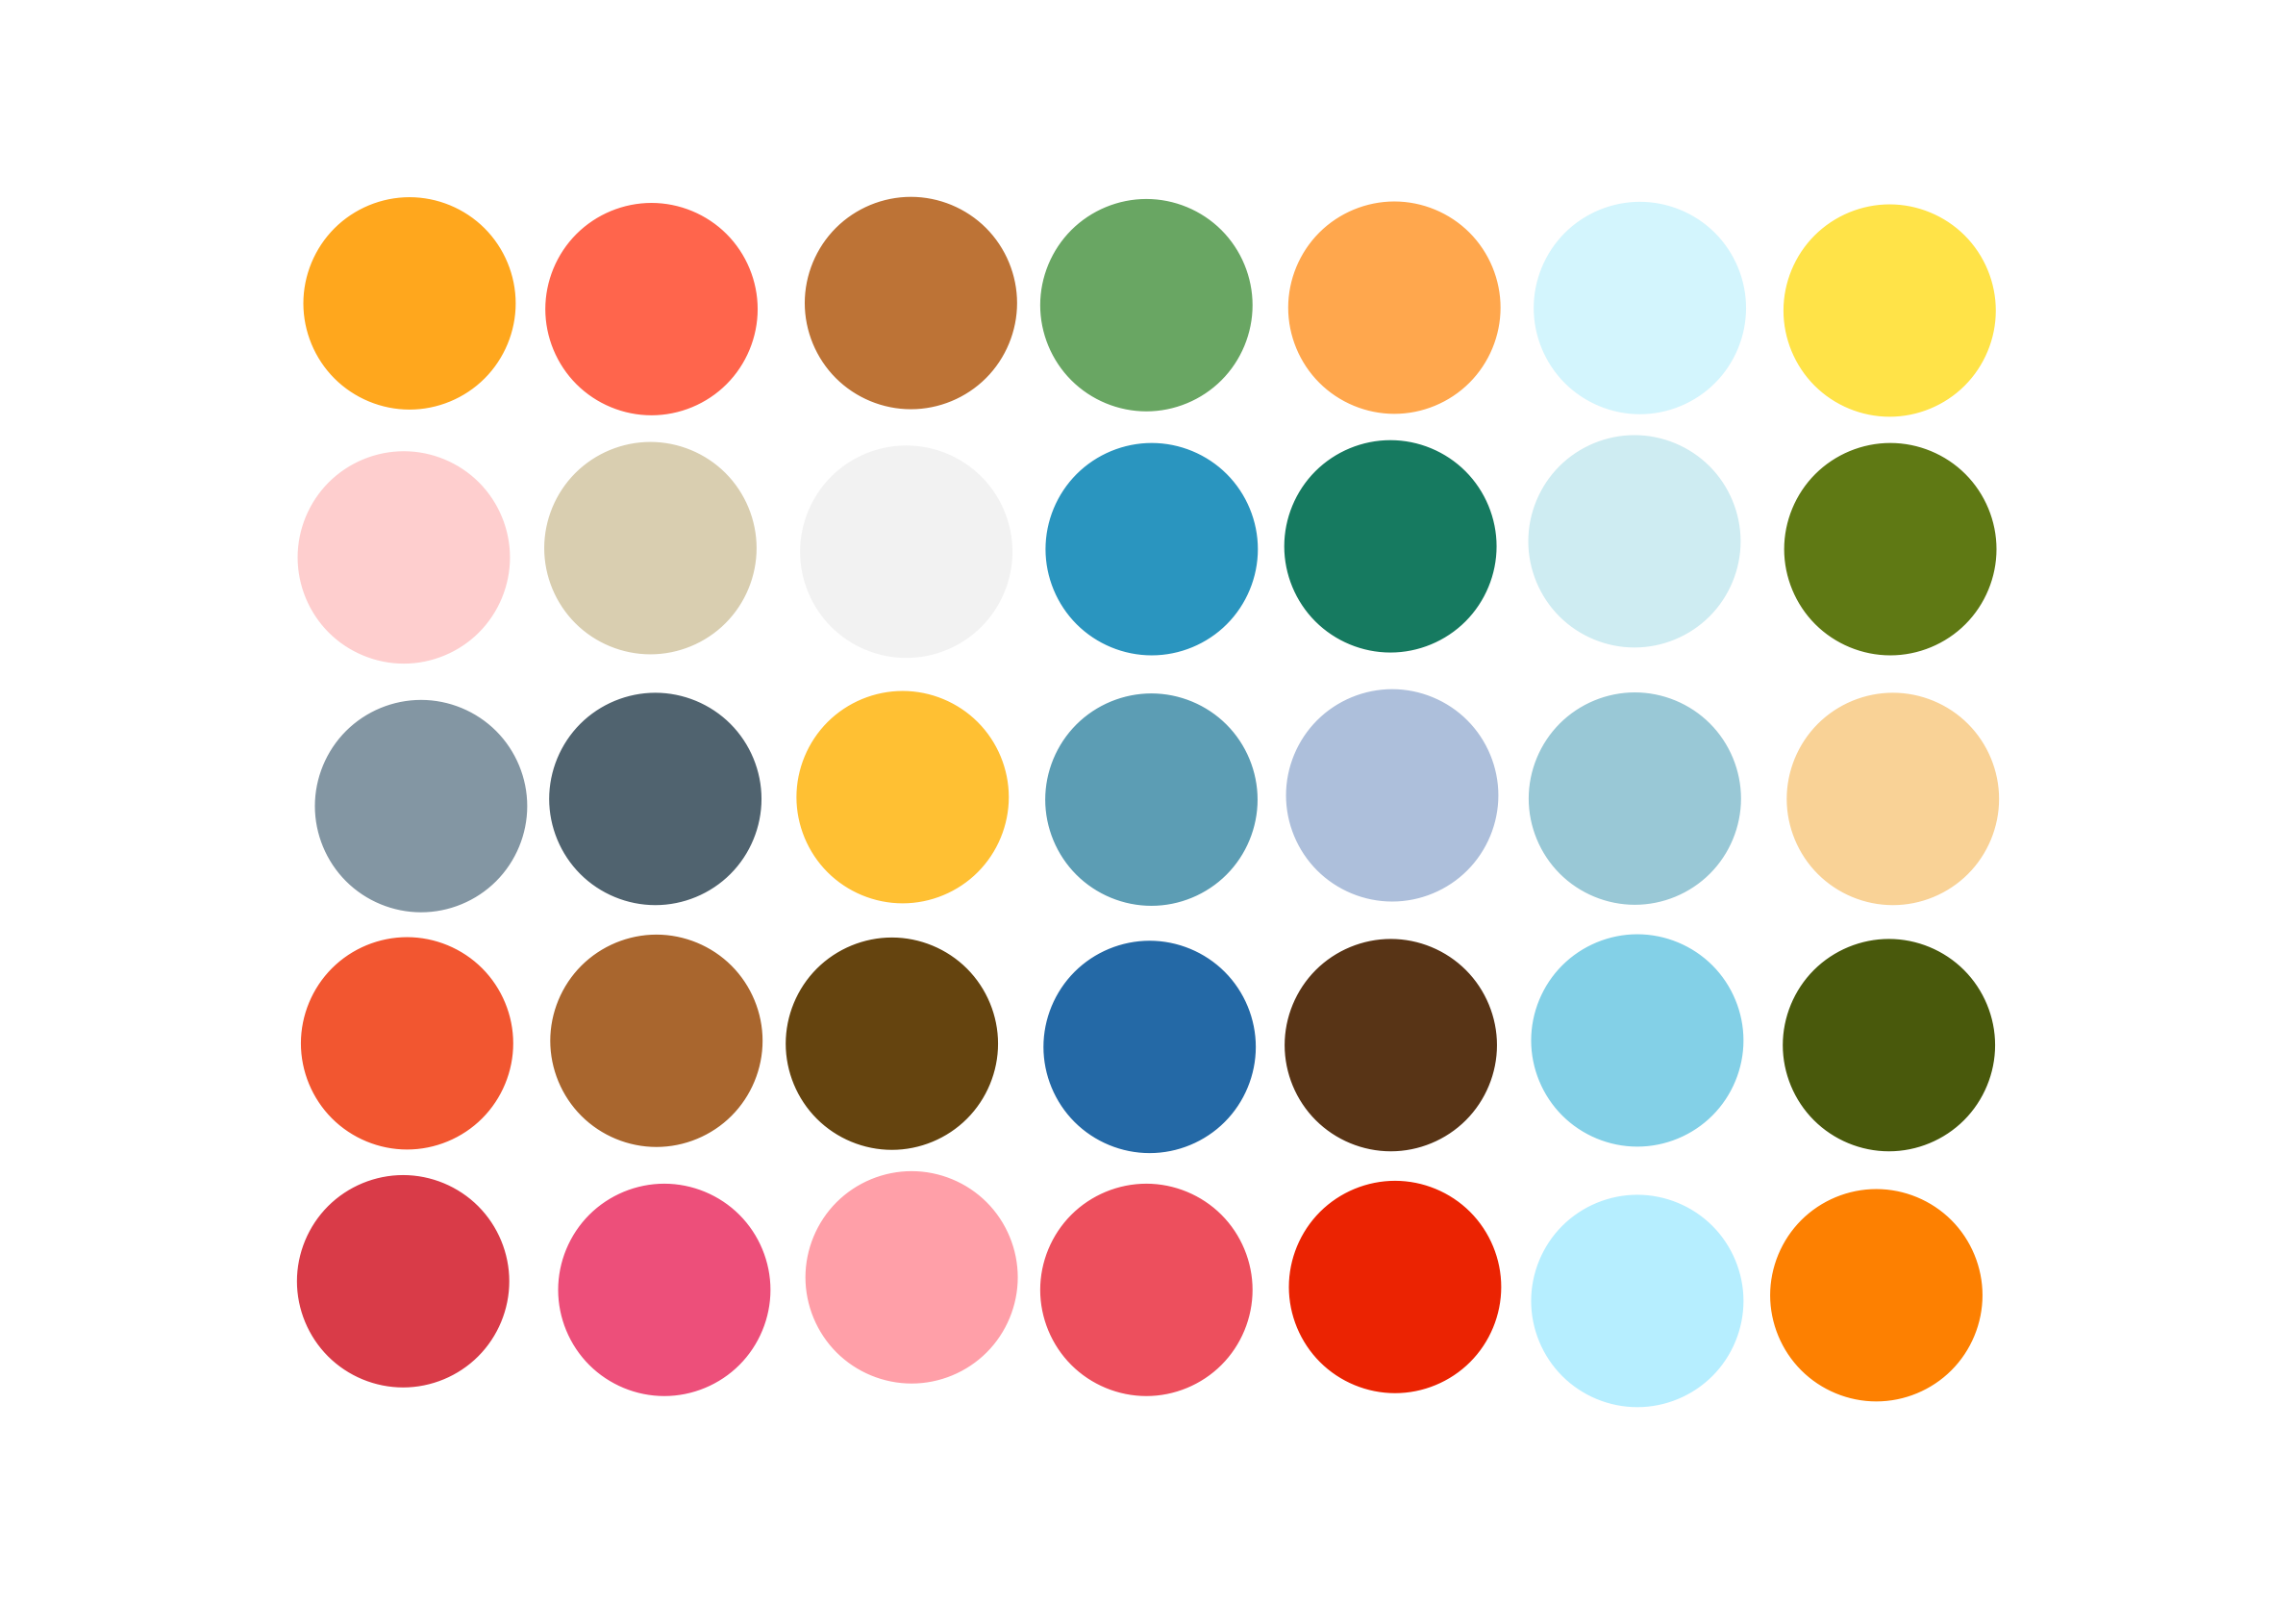
Tap on the brush icon to open the brush library. Choose a brush that suits your style and the type of lines you want to create for your cityscape. You can experiment with different brushes to find the one that works best for you. Also, select your desired colors from the color picker or create a custom color palette. Download the color palette from the link provided above. I also mention all the brushes that I use and the brush settings for each of these brushes.
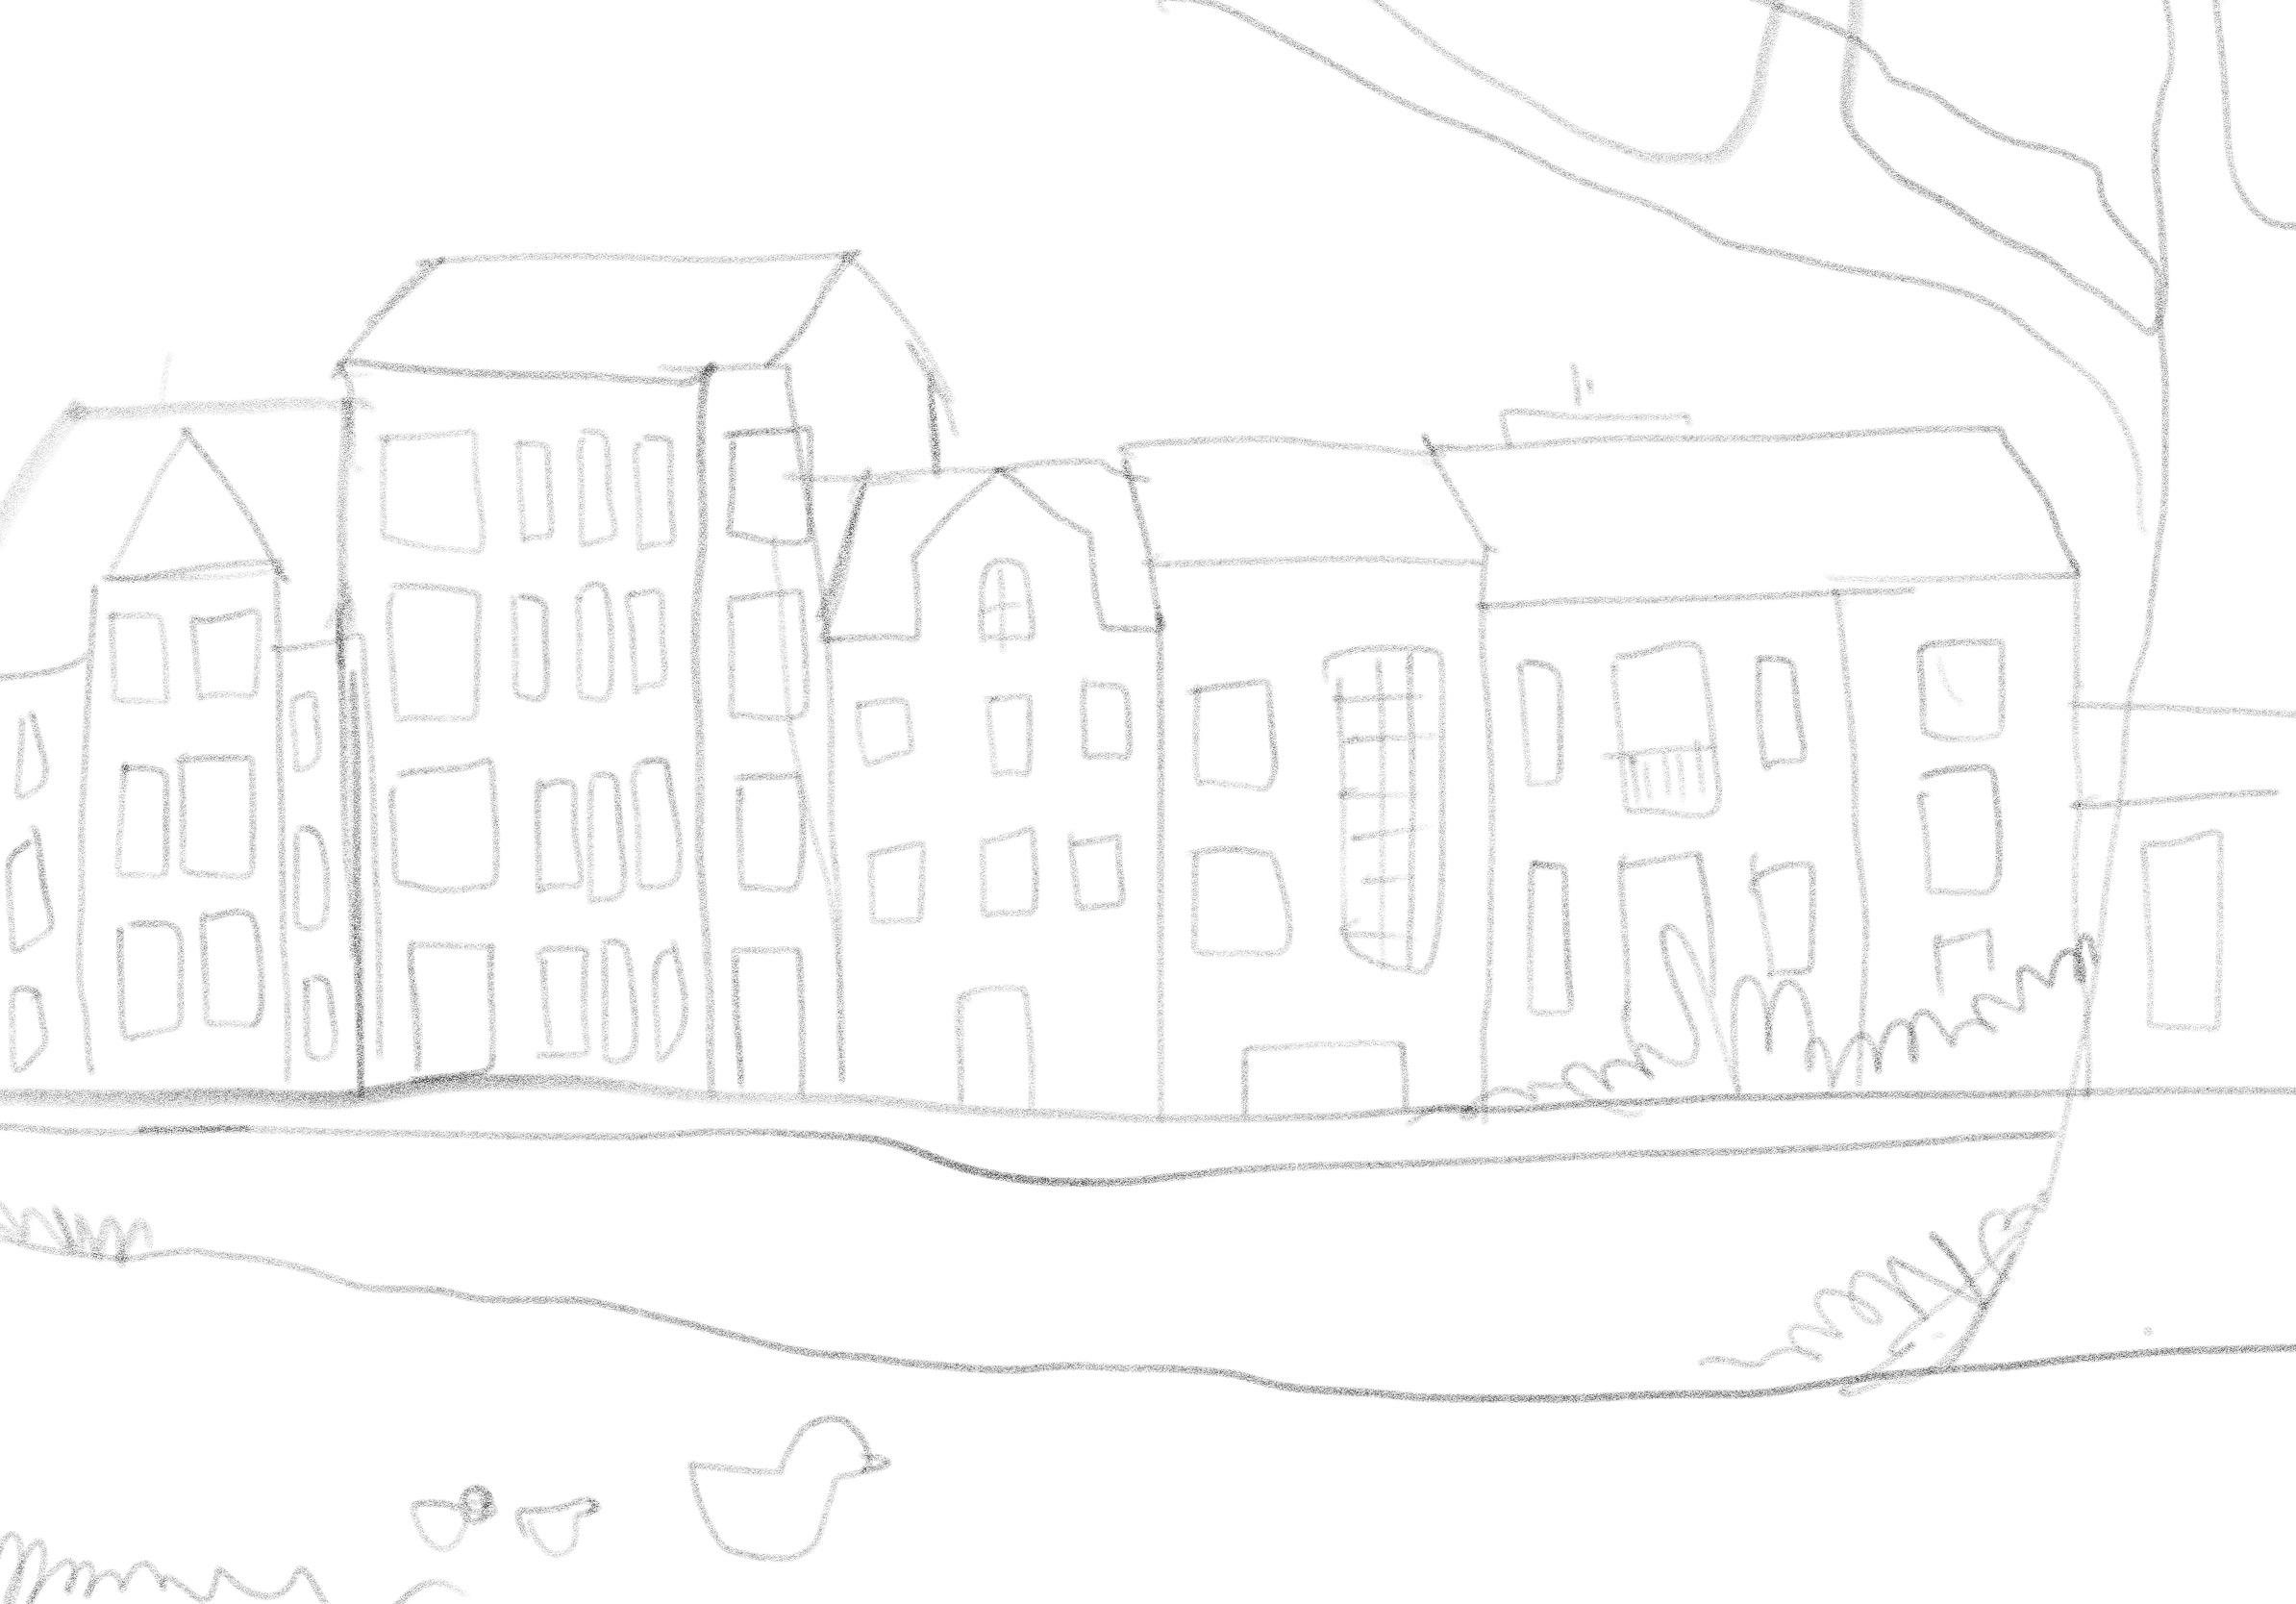
Step 3: Sketch the outlines
Create a new layer by tapping on the layer icon and selecting “New Layer.” Set the layer blending mode to “Multiply” or “Multiply (linear burn).” This will allow you to sketch the outlines without affecting the colors beneath. Using a lighter color, begin sketching the basic outlines of the buildings, roads, and other elements of the cityscape. Start with simple shapes and gradually add more details. Since I have already provided a sketch for this tutorial (download link provided above), you can just import it and set the layer as multiple.
Step 4: Refine the shapes
Once you have the basic outlines in place, create a new layer above the sketch layer. Lower the opacity of the sketch layer to make it less visible. Using a darker color, refine the shapes of the buildings and other elements, adding more details and adjusting proportions as needed.
Step 5: Add colors and textures
Create a new layer below the outline layers. This will be the layer where you’ll add colors and textures. Start by blocking in the base colors for the buildings, sky, and other elements. Use a combination of solid colors, gradients, and brushes to create interesting textures and effects. Experiment with blending modes and layer opacity to achieve the desired look.
Step 6: Add details and highlights
Create new layers above the color layer to add details and highlights. Use a smaller brush size to add windows, doors, signs, and other architectural features to the buildings. Add highlights and shadows to create depth and dimension. You can also use the eraser tool or layer masks to refine edges and create subtle transitions.
Step 7: Refine and polish
Take some time to step back and evaluate your cityscape illustration. Make any necessary adjustments to colors, values, and details. You can experiment with different brushes, blend modes, and layer adjustments to enhance the overall look of your illustration.
Step 8: Final touches
Once you’re satisfied with your cityscape, merge the layers together or group them for easier handling. You can also add additional elements such as trees, cars, or people to further enhance the scene. Experiment with different layer effects, such as overlays, to give your illustration a finishing touch.
Step 9: Save and export
When you’re ready to save your cityscape, tap on the share/export icon. Choose the desired file format (such as PNG or JPEG). You can save the image to your device or share it directly to social media platforms or other applications.
That’s it! With these steps, you can illustrate a beautiful cityscape using Adobe Fresco. Remember to practice and experiment with different techniques to develop your own unique style. Enjoy your creative journey!
Topics: Illustrate a cityscape, Adobe Fresco


No Comments